Hello

These are my musings on lots of things, some related to computers and the web, some not.
As time goes on I will categorise them (the list of categories is over to the right under the calendar) so that you can sift the stuff you may be interested in from that which you won’t be!

The Blog – along with the rest of the site – runs on WordPress using a theme called Weaver II – a very customisable theme allowing almost anything to be changed from the overall layout to the colours and images.

This post is sticky so it will always be at the top.

Annoying Mouse Cursor Flicker

I recently noticed that my mouse pointer would flicker every few seconds showing the little blue circle to the right. Nothing was broken but I get wound up by silly things like this and I wanted to make it stop.

After a bit of research on the net (most of which was to do with an HP issue with laptop mousepads) and some experimentation I found that the culprit was Chrome and Gmail. By default Gmail will display a list of people you can start a Google “Chat” with on the left of the browser page. Go into the Gmail settings and turn off the chat option and the flickering cursor stops flickering. The list of people to chat to isn’t shown any more but I rarely use Google Chat so that isn’t a problem for me. If I do use it in future I will just switch the option back on again.

This has solved another issue for me as well. I have a laptop with a touch screen and when I load Gmail on that, it detects the touch screen and stops the mailbox list expanding when you hover the mouse over it. You have to click on “more” at the bottom of the list to expand it. I tried switching off the touch screen detect in Chrome but that didn’t work. With Google Chat disabled the list of people doesn’t display so I now see my full mailbox list. Result!

Windows 10 and Screen Sleep

Ever since the Creators Fall Update to Windows 10 I have had an issue with my screen not sleeping correctly. It would sleep after the set time but then wake up randomly for no apparent reason. Although it wasn’t a show stopper it was annoying and I spent a lot of time trying to sort it out. Different keyboard and mouse, different keyboard/mouse USB port, move devices to different USB ports etc etc. Nothing I tried worked.

Because it only started after the Fall update I thought it must be a Windows 10 or a driver issue. Which I guess might be true because in the end it turned out to be my USB joystick. It’s an old Black Widow Speed Link which I use for flight simulators. Unplug that and the problems go away. I couldn’t find a driver update for it and as it’s so old I don’t suppose I will – so now it stays unplugged until I need it.

Firefox and the Refresh Button

FFclipEveryone has their favourite browser – mine is Firefox. I changed from an earlier version (it might even have been Netscape then) to Chrome shortly after Google released it. Chrome was a better browser back then but I changed back to Firefox when Chrome started slowing down and hogging my memory.
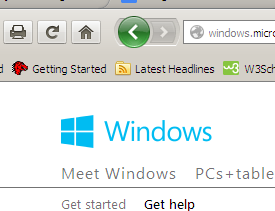
Anyway, Firefox is currently up to version 32 and for the most part is stable, fast and not too resource hungry. But back around version 29 they decided to change the URL toolbar so that the Refresh button was on the right of the URL entry box, and the Forward/Back button were attached to the URL box on the left.
Now I, like a lot of other people if the comments on various blogs and forums are anything to go by, object to this. I don’t mind a few changes to the user interface. After all things move on and fashions change. But I do mind the change being forced on me and then not being allowed to use the customise options to put things where I want them. I kept looking for my nice big Refresh button (see the picture above) and it wasn’t there. It was a little farty thing over on the right.

So, what to do. In the end I added two new extensions from the same developer – Classic Theme Restorer and Classic Toolbar Buttons. Together they allow the toolbar to be styled a way that Mozilla should have provided in the first place. But if it takes an extension or two to do the job then that works for me. So congratulations to Aris who developed the extensions. I think I will be making my small contribution to your cause soon!

CONVERTing USB Memory Sticks to NTFS

We all know that USB memory is getting smaller (in physical size), bigger (in memory size) and cheaper. I just bought two 16Gb Sandisk Cruzer Fit units – primarily to have one as my mp3 library for the car. I have always been mindful that a “full size” memory stick pushed into the front of the head unit is very vulnerable to getting sideswiped. At best breaking the memory stick, at worst breaking the USB socket. So I have always had a short 90 degree USB extension cable fitted with the memory stick tucked into a cubby under the stereo.

The Cruzer Fit is tiny. Once it pushed into the USB socket there is only just enough of it protruding to be able to grab it and pull it out again. It looks much better than my old extension cable and won’t break if it gets knocked.

I got two of them because I bought them from Amazon and it meant I got free postage. The other one I am using as a backup device – which leads me to the main reason for this post. One of the files I wanted to back up was a 5Gb video and when I tried to copy it my PC said the destination was not big enough – which clearly was not the case. It turns out that the memory stick is formatted as Fat32 and as you will all know (?) the Fat32 system has a maximum single file size of 4GB. So the answer is to reformat the memory stick to NTFS – but what’s the best way?

Well on my old PC it turns out the best way (in my humble opinion) is a Command Line application called convert. Here is the output if you type “convert /?”.

Converts FAT volumes to NTFS.

CONVERT volume /FS:NTFS [/V] [/CvtArea:filename] [/NoSecurity] [/X]

  volume      Specifies the drive letter (followed by a colon),
              mount point, or volume name.
  /FS:NTFS    Specifies that the volume is to be converted to NTFS.
  /V          Specifies that Convert should be run in verbose mode.
  /CvtArea:filename
              Specifies a contiguous file in the root directory to be
              the place holder for NTFS system files.
  /NoSecurity Specifies the converted files and directories security
              settings to be accessible by everyone.
  /X          Forces the volume to dismount first if necessary.
              All opened handles to the volume would then be invalid.

So all you need to do (at it’s simplest – and assuming your memory stick is drive F:) is type “Convert F: /FS:NTFS”. It keeps any files already on the drive (although I would back them up first if they are important) and on my machine took about 5 seconds. Job done!

I have worked with Command Line utilities for years and I have never used this one before. You live and learn. It only works in one direction – Fat to NTFS – you will need to reformat using something else if you need to make it a Fat drive again. But with the increasing size of memory sticks and files, I thought it was worth sharing.

Highlight Todays Date in the WordPress Calendar

You may have noticed that there is a calendar displayed on the right of the blog page. This is the standard WordPress calendar widget and is designed to highlight the dates of blog posts so they can be clicked and jump straight to the post. But I also wanted to highlight todays date – just to make it a bit more useful. It turns out that this is quite easy. You just need to add a snippet of CSS into the <head> section of your site. In the WeaverII theme this is very easy – it is in the Appearance/Weaver II Admin/Advanced Options menu. In the <head> Section menu add the following code to the Custom CSS Rules:

#wp-calendar #today {
background:#FF9340;
color: #000000;
}

That will make todays date cell an orange colour and the text black – but you can obviously change the background and text colours to whatever you like.

Abandoning Chrome for Firefox

I switched to Google Chrome as my browser of choice about two years ago. At the time it loaded faster, rendered faster, and generally seemed better than Firefox which it replaced. It also downloaded big files faster than any other browser I had.

Over the last few months I have seen Chrome gradually get worse as it upgraded itself – without asking or informing me – another thing I don’t like. When you open lots of tabs it can get really slow, sometimes repainting a page painfully slowly as (I guess) it was page switching from disk. Looking around on the web it seems that the later versions are well known as a memory hog – not such a bad thing if you have vast amounts of ram – a pain if you have a laptop with “only” 4Gb.

So I have abandoned Chrome and returned to Firefox. I will miss some things – like the real-time speeling chucker – but I won’t miss others like sitting waiting for pages to refresh. I will keep an eye on Chrome and see if they return it to the fast, slick browser it used to be. In the meantime I will update this page if I find anything which makes me change my mind again!

UPDATE:  Yes I know Firefox has a spelling checker but it hasn’t worked on my computers for a long time. Turns out that if you are in the UK you have to right-click on a word, add the English UK dictionary, then once it’s added right click on a word again and click Check Spelling. Then it works! Not exactly intuitive but at least it’s there.

UPDATE 2:  And back again!  It’s 2017 and I have switched back to Chrome. Firefox was getting slow again and Chrome seemed to have sorted out most of it’s speed and memory issues. I wish there was something similar to FireFTP for Chrome though – I really like that Firefox Addon.